Creating and using sub-groups
Sub-groups allow you to create smaller groups within your larger groups or courses. This can be good for breaking users into smaller groups or organizing a course by week or assignment.
In order to be a member of a sub-group, a person must also be a member of the “parent group”, or the group or course under which that sub-group falls. Only an administrator for a Group can create sub-groups under it.
New VT
Creating a sub-group
- Expand the sidebar on the left side of your home page, and click on the groups tab.
- Click on the group under which you would like to create a sub-group.
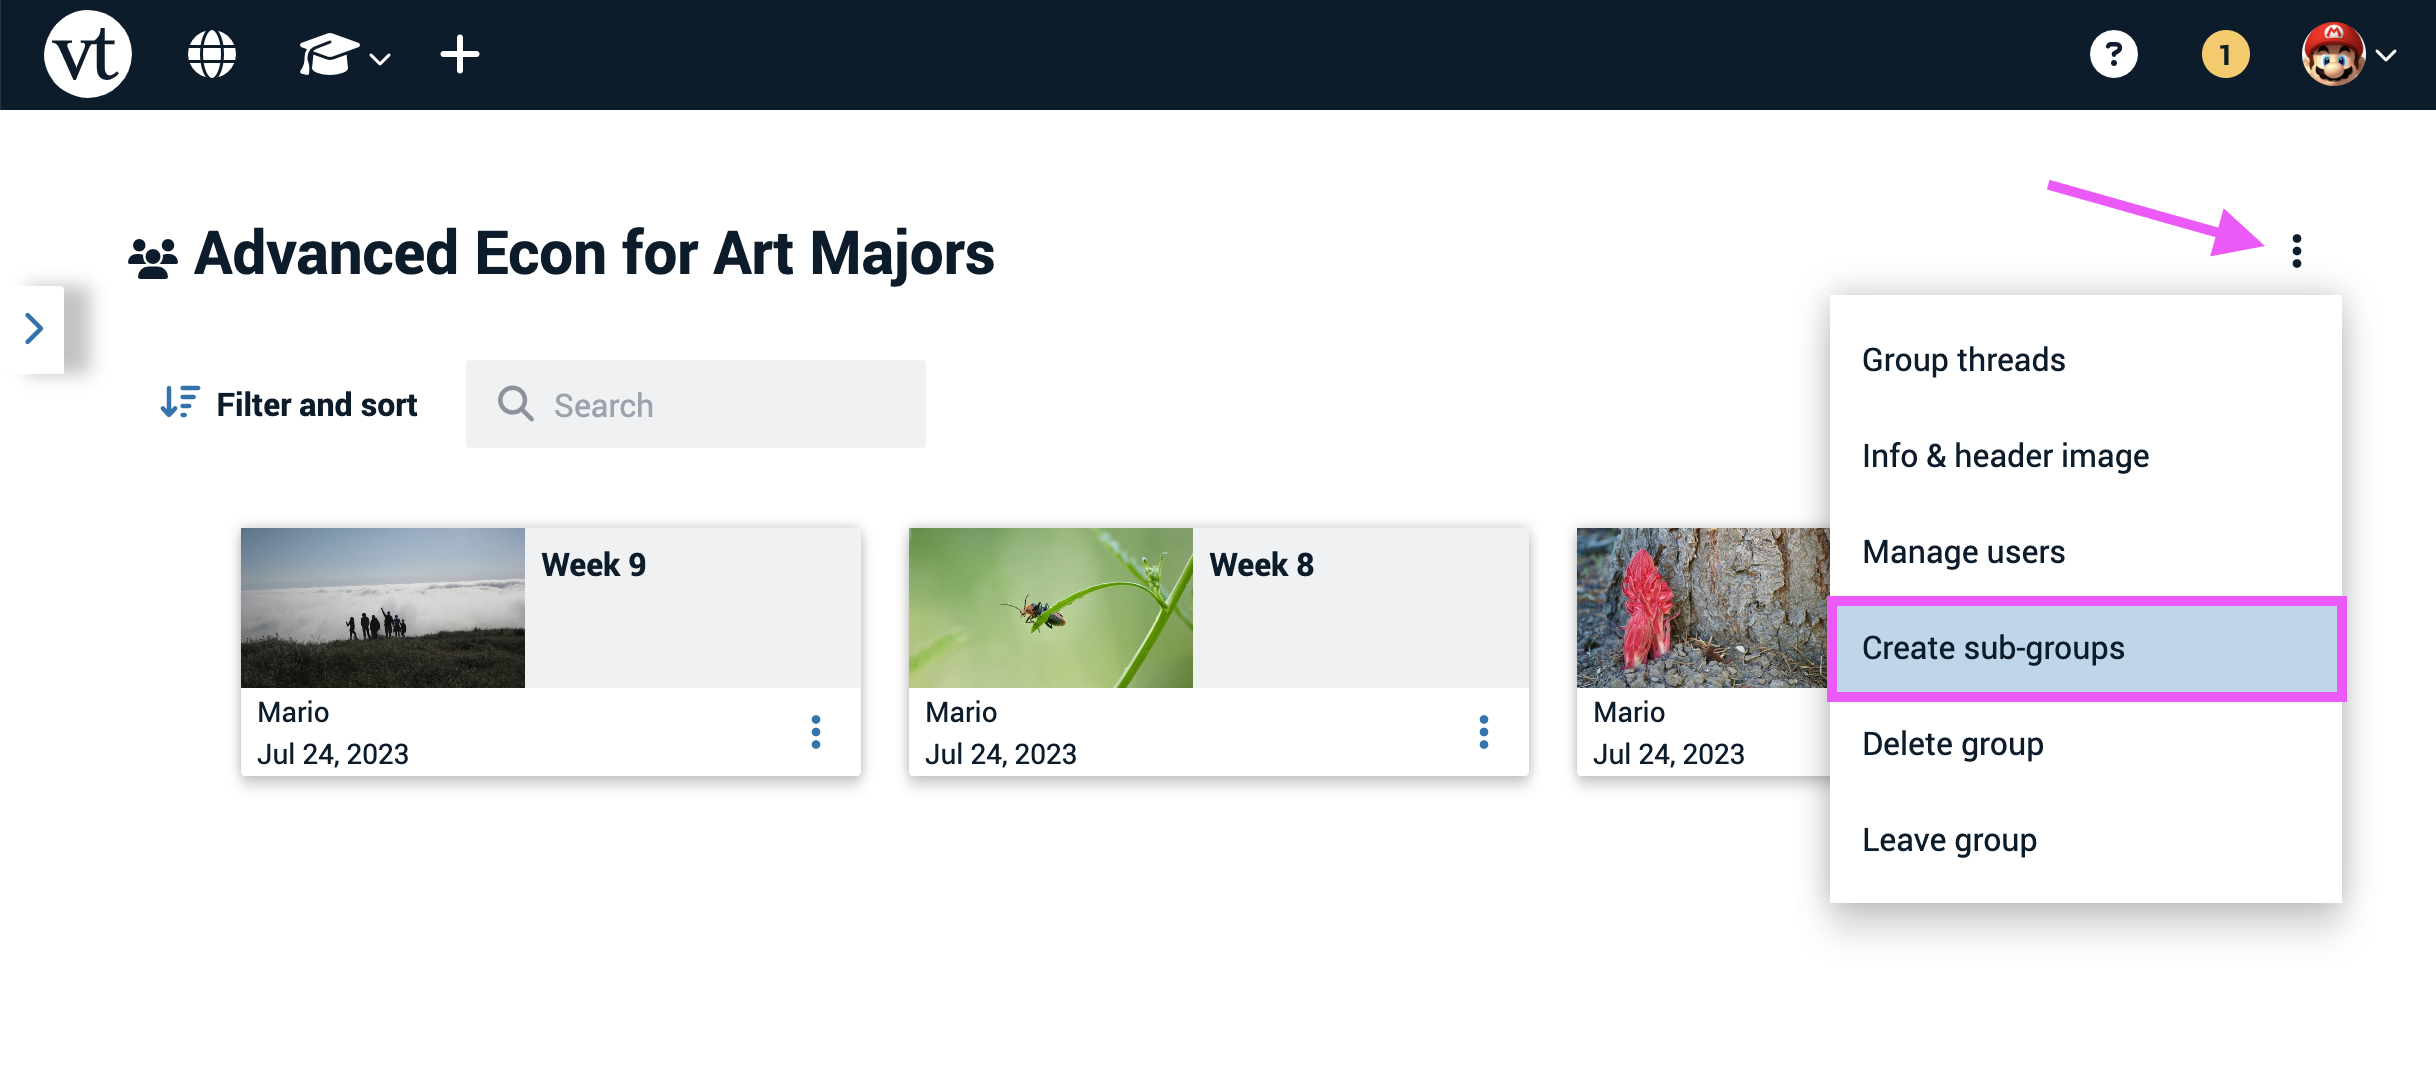
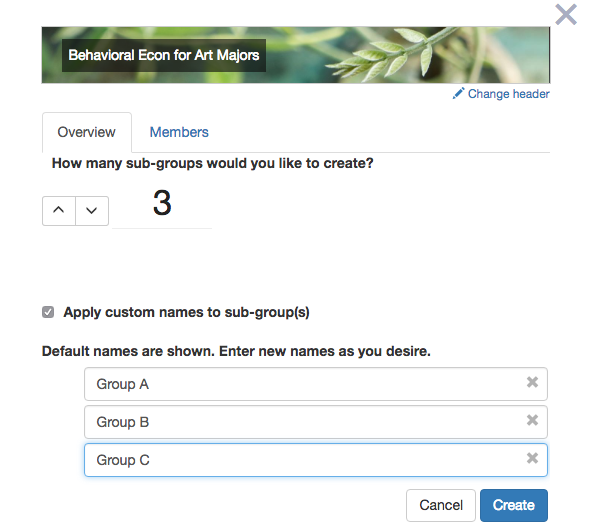
- Click on the menu icon in the top-right corner, and select “Create sub-groups.”
- Enter the number of sub-groups you’d like to create.
Apply custom names to sub-group(s): Check this box to name your sub-groups. If you don’t use this option, preset names will be given to them.
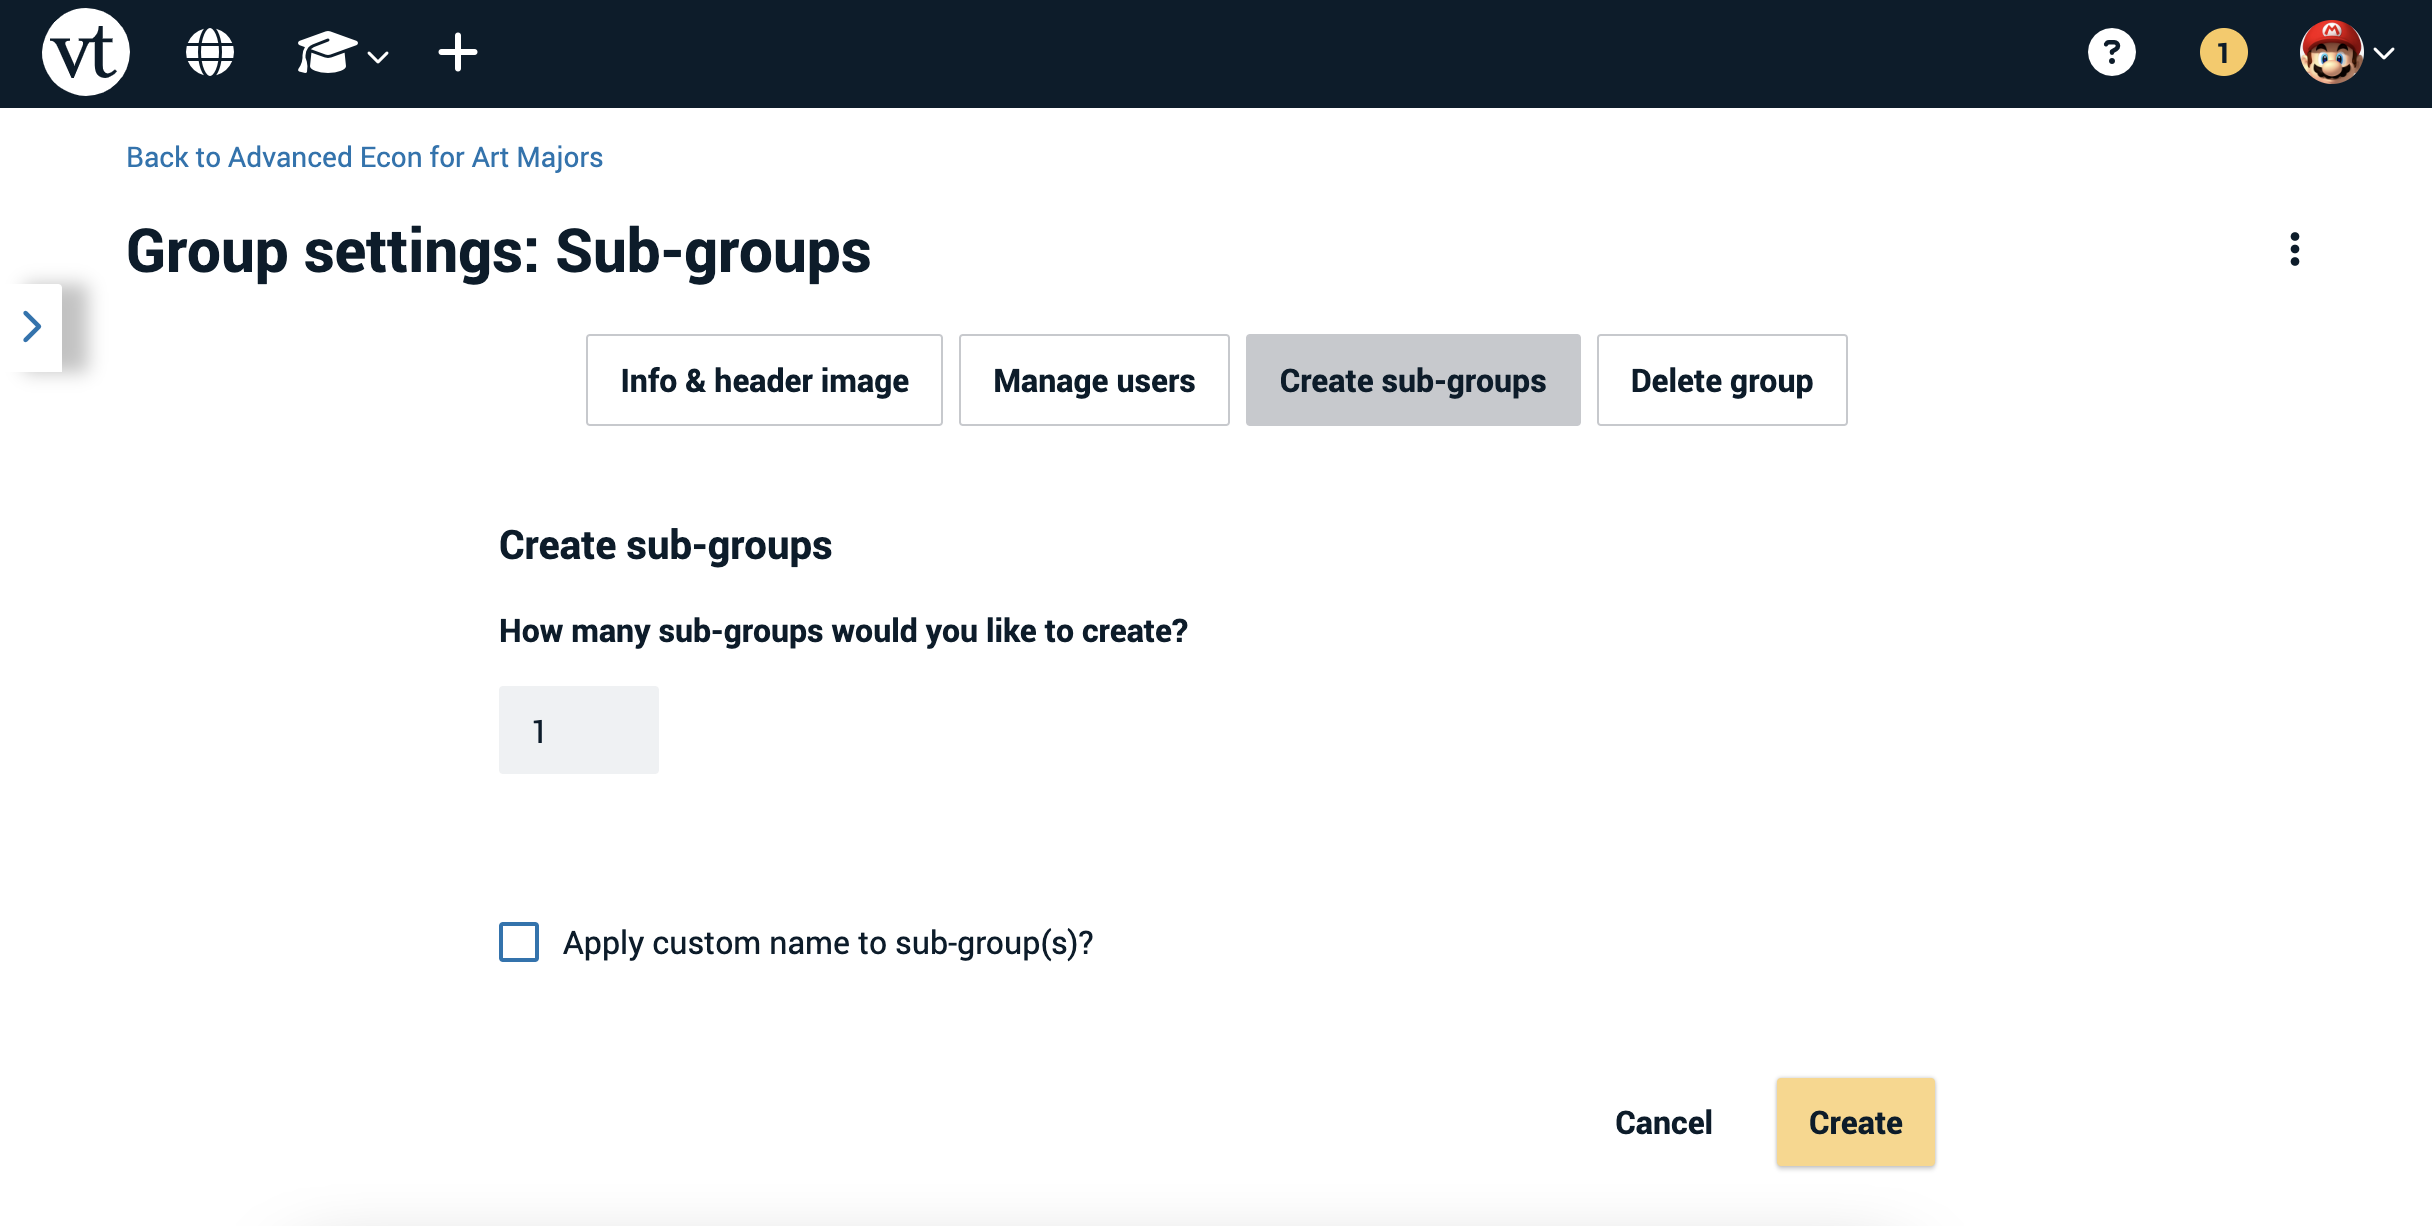
- Click “Create.”
Legacy VT
Creating a sub-group
- Go to your VT Home Page.
- Click on your email address in the top-right corner of the page.
- Select “Groups and Contacts” from that menu.
- Go to the Overview tab.
- Click on “Create sub-group(s)’.
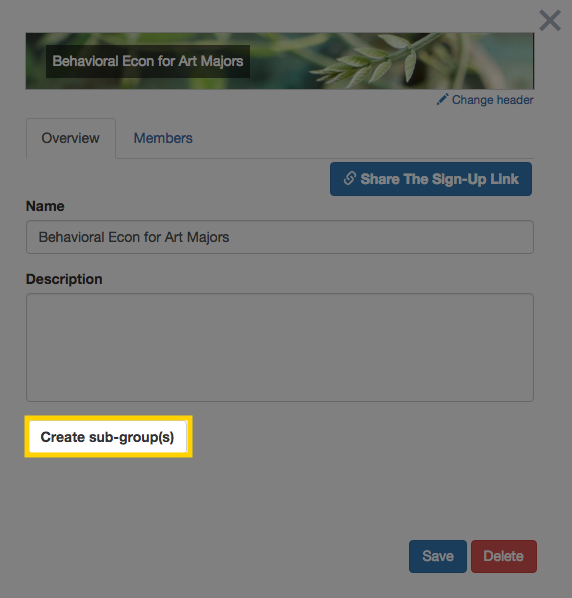
- Enter the number of sub-groups you want to create.
Apply custom names to sub-group(s): Check this box to name your sub-groups. If you don’t use this option, preset names will be given to them.
- Click “Create”.
Adding people to a sub-group
People can join a sub-group in the same way that they join a regular group. When someone joins a sub-group, he will also be added to the parent group automatically.
Note that if your parent group was created automatically by your LMS or SIS, then only people who are already members of the parent group may join a sub-group.
Using sub-groups
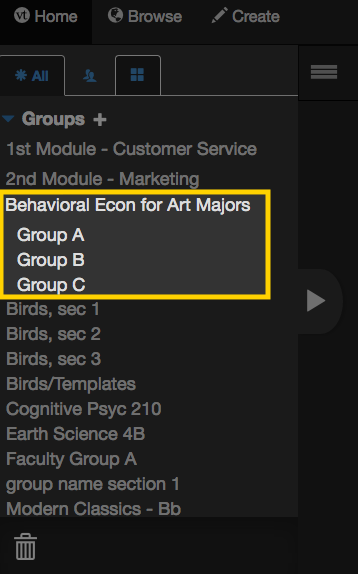
Sub-groups behave just like regular groups, as well. Any member can share VoiceThreads and view anything shared there. The sub-groups will be displayed directly under the parent group and slightly indented on your VT Home Page.